Lab 1 - Artemis and Bluetooth
Lab 1 has two sections, Lab 1A and Lab 1B. Lab 1A is familiarizing ourselves with the Arduino IDE and Artemis board, while Lab 1B involved communicating to the artemis board via Bluetooth.
Part A
Prelab:
I set up the Arduino IDE on my personal macbook so I could work on ther Artemis board, installing Arduino IDE 2.3.4. Additionally, I also installed the Sparkfun Apollo3 Arduino Core, allowing the Arduino IDE to recognize our Artemis board.
Task 1 - Connecting Artemis Board:
The first part of Lab 1A was to get the Artemis Board connected to my computer and recognized in the Arduino IDE. I didn't encounter any issues with this step.

Task 2 - Blink:
The next step was to run the example program Blink. This was accomplished by loading the example program included with the Apollo3 core, and then flashing it to the board.
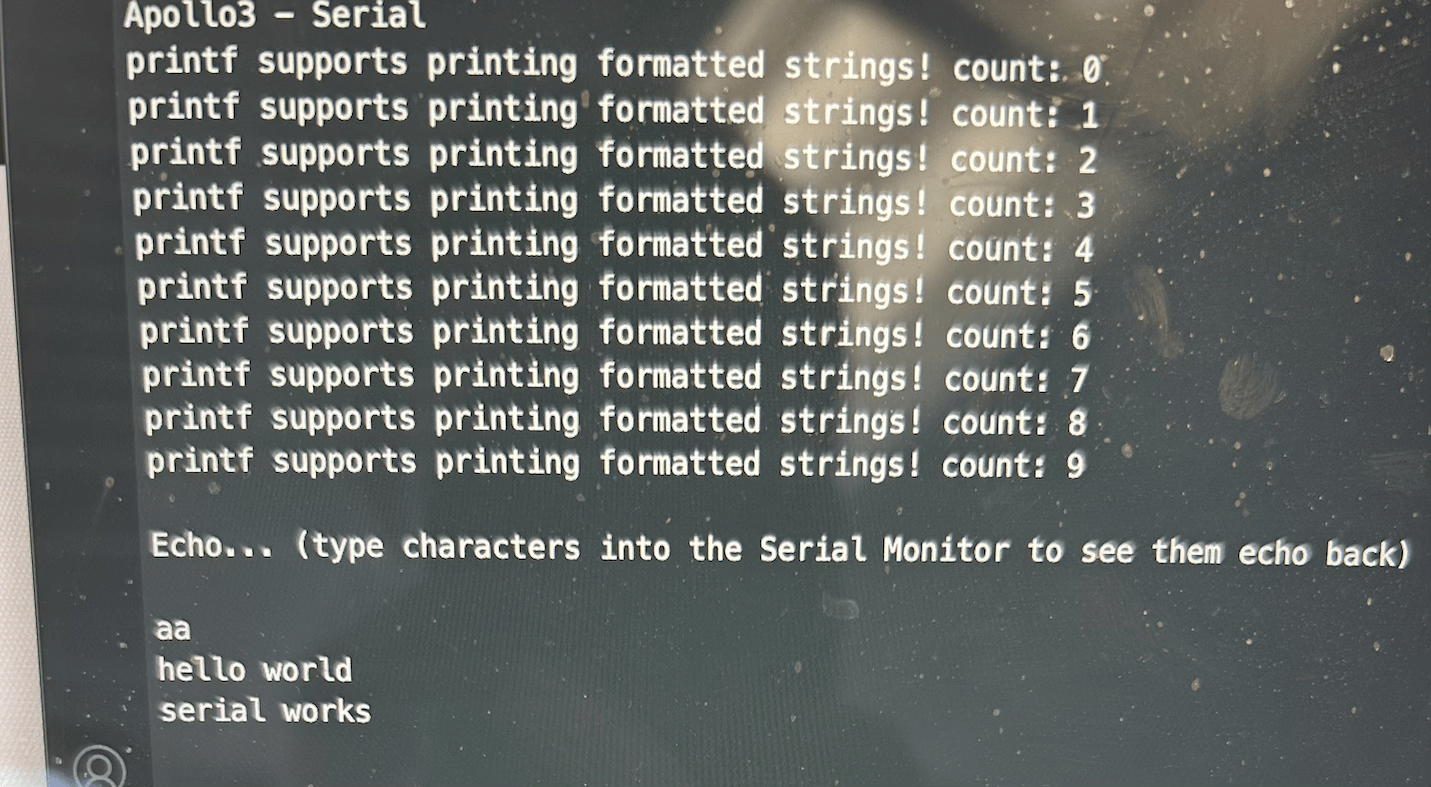
Task 3 - Serial:
The next task used the Serial example, which listens for typed characters and echoes them to the serial monitor. This program validated the serial output behavior of the Artemis.
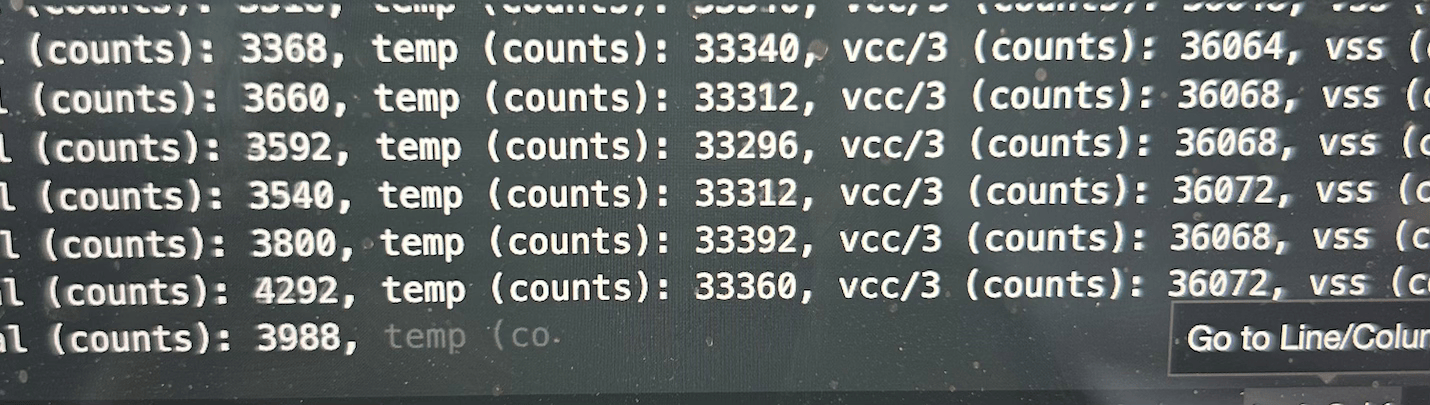
Task 4 - Analog Read:
Task 4 was running the Analog Read example, which uses an onboard ADC to get the analog voltage from the temperature sensor. I used my body heat to heat up the sensor to test it. I found it easier to change the sensor readings by applying heat to the back of the board due to the shield on the chip.
Task 5 - Microphone:
The final example for Lab 1A was to interface with the MicrophoneOutput example. This example would print the highest frequency the microphone was recording in Hertz. I tested this by varying the pitch of my voice and playing a set Hertz value, verifying the output.

5000 Task - C Note Recognition:
I had the additional task of programming the LED to blink whena musical "C" was played.
I started with the MicrophoneOutput example, renaming it to Cblink.ino.
Firstly, I determined that middle C is 261 Hertz. Then, I checked if the loudest frequency was within 5 Hertz. If it was, I would then blink the LED once.
However, there are multiple different octaves of C, each with their own frequency.
I programmed several other common octaves (C3-C7) so it could recognize more C notes, seen below.
                    float midc = 261;
                    if((abs(0.5*midc-ui32LoudestFrequency) < 5) | //C3
                      (abs(midc-ui32LoudestFrequency) < 5) | //C4, if 5 off middle c either way
                      (abs(2*midc-ui32LoudestFrequency) < 5) | //C5
                      (abs(4*midc-ui32LoudestFrequency) < 5) | //C6
                      (abs(8*midc-ui32LoudestFrequency) < 5)) { //C7
                        digitalWrite(LED_BUILTIN, HIGH);  // turn the LED on (HIGH is the voltage level)
                        delay(500);                      // wait for a second
                        digitalWrite(LED_BUILTIN, LOW);   // turn the LED off by making the voltage LOW
                        delay(500);
                    }
Part B
Prelab:
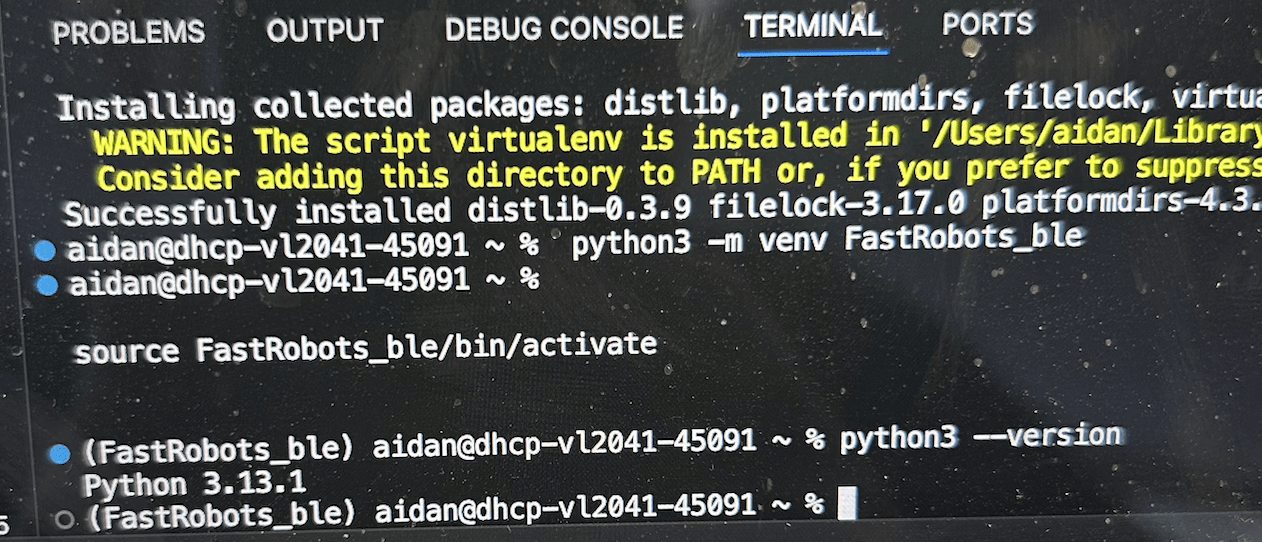
The part B prelab involved familiarizing myself with the BLE protocol and setting up a Python environment. I used VSCode to set up a python 3.13.1 environment, and created a virtual environment for Fast Robots and installed the specified packages.
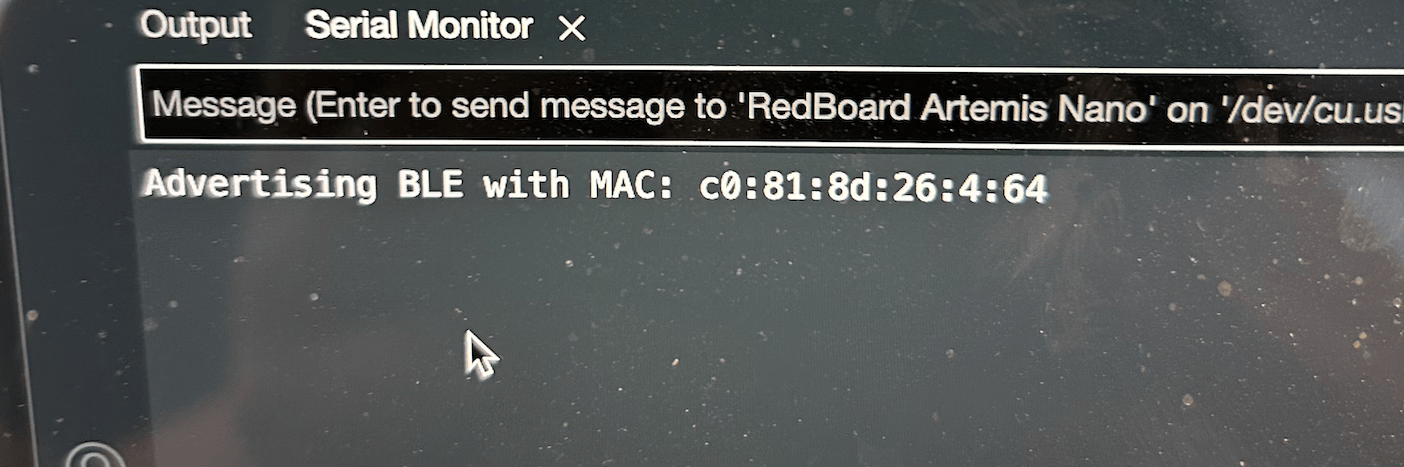
I ran through the codebase demo code, generating a new UUID. I then installed the ArduinoBLE library, getting the MAC address. The codebase is split into two main sections, being the Python side BLE and Arduino side BLE. These pair over bluetooth via the specified MAC address. The python side can then send commands to the Arduino via BLE services, provided these services are defined on both sides. From there, the Arduino side can run a function and communicate back using GATT characteristics. This communication can be directly read, or have a callback function. These characteristics are defined by their UUID.
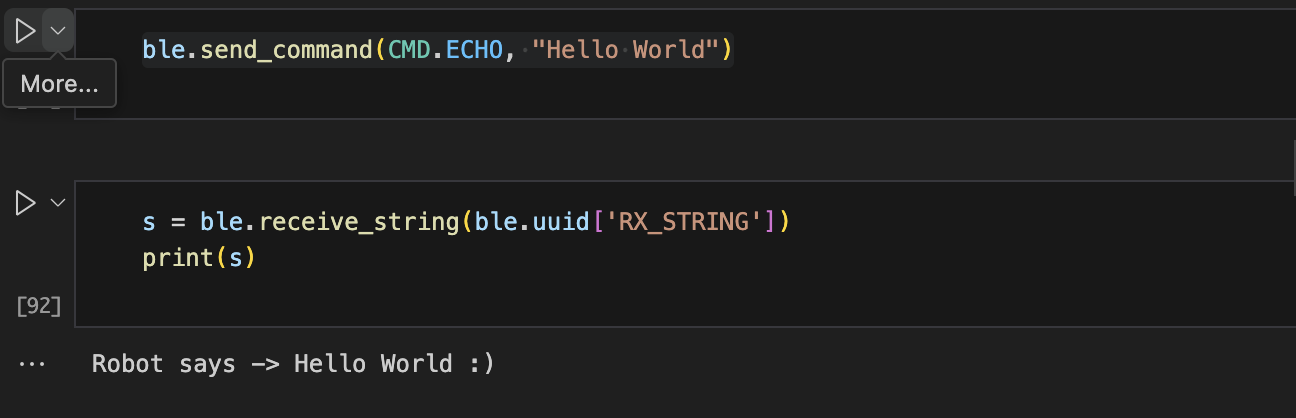
Task 1 - Echo
This task required sending a string to the Arduino, and the Arduino augmenting it and sending it back.
The Echo command was already defined, so the echo command could be sent with ble.send_command(CMD.ECHO, "Hello World")
This would trigger the Echo case on the Arduino, and success = robot_cmd.get_next_value(char_arr); gets the Hello World string.
This is how all arguments passed from Python to Arduino will be received for this lab. I augmented the string by
using strcat. While this works, I later realized that the Enhanced strings can simplify this.
The altered string is returned with the following code:
                    tx_estring_value.clear();
                    tx_estring_value.append(ret_arr);
                    tx_characteristic_string.writeValue(tx_estring_value.c_str());

                    Serial.print("Sent back: ");
                    Serial.println(tx_estring_value.c_str());
The above code is roughly the procedure that will be used for sending any string back.
Task 2 - Send Three Floats
This task sends 3 floats from Python to Arduino and prints them via serial.
The command being sent with ble.send_command
and 3 floats are passed as a string argument. The Arduino creates 3 floats and populates them with
robot_cmd.get_next_value. The 3 floats are then printed.

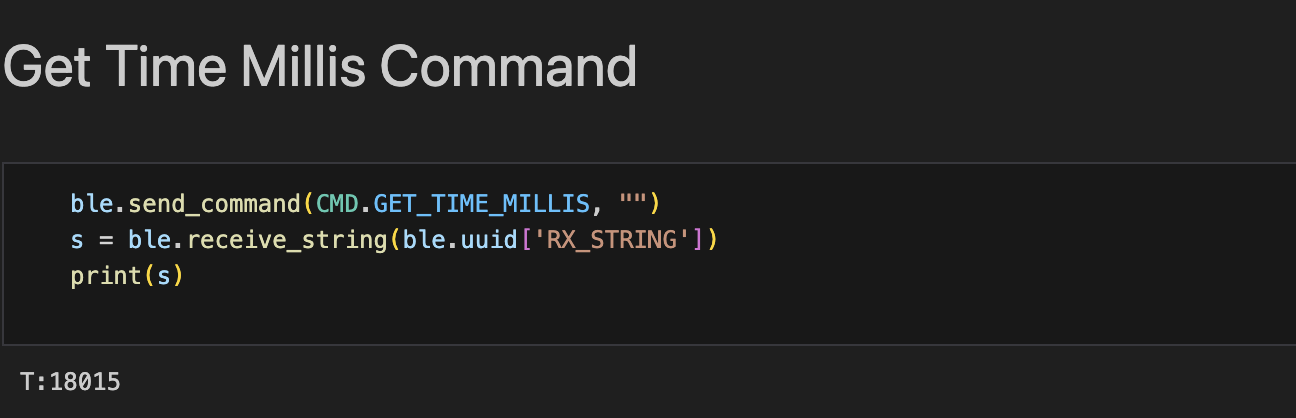
Task 3 - Get Time Millis
This task prompts the Arduino to return it's uptime in milliseconds, requiring a new command.
This was done by adding a case to the .ino code, and adding GET_TIME_MILLIS to the Arduino and Python commannd types.
From there, the command was called via python. The uptime can be found with millis(), so I return the time with
                    tx_estring_value.clear();
                    tx_estring_value.append("T:");
                    tx_estring_value.append(int(millis()));
                    tx_characteristic_string.writeValue(tx_estring_value.c_str());
This time, I use the append function of enhanced strings to prepend "T:"".
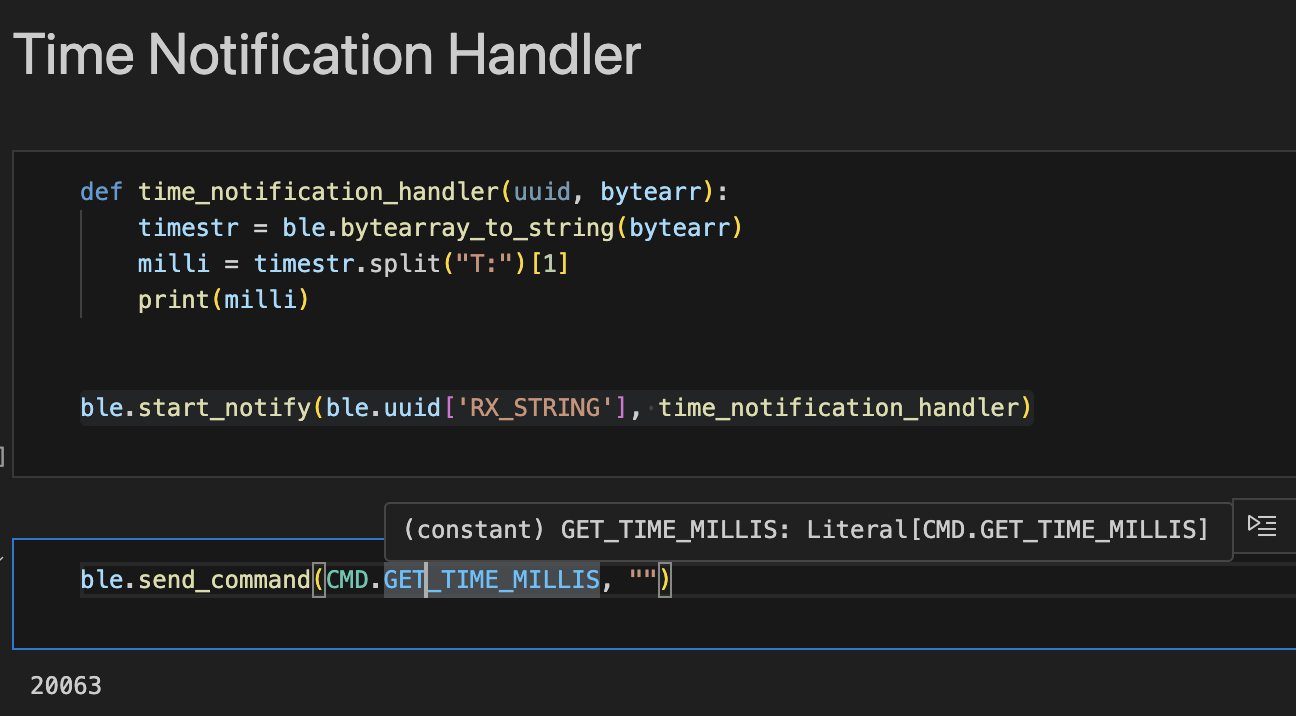
Task 4 - Notification Handling
This task uses notification handling instead of ble.receive_string.
This is initiated with ble.start_notify(ble.uuid['RX_STRING'], time_notification_handler),
which calls the time_notification_handler callback whenever a string characteristic is received, with the characteristic in a byte array.
To extract the time, this byte array is converted to a string and then split() isolates the time.
Now, whenever GET_TIME_MILLIS is called, the string characteristic is automatically received and parsed for time.
Task 5 - Looping Time
This is expanded by having the arduino send its time in milliseconds in a loop, to observe the speed of transfer. I implemented a new command, START_TIME_LOOP, which contiguously sends the millis() command for 5 seconds, which the notification handler recieves.
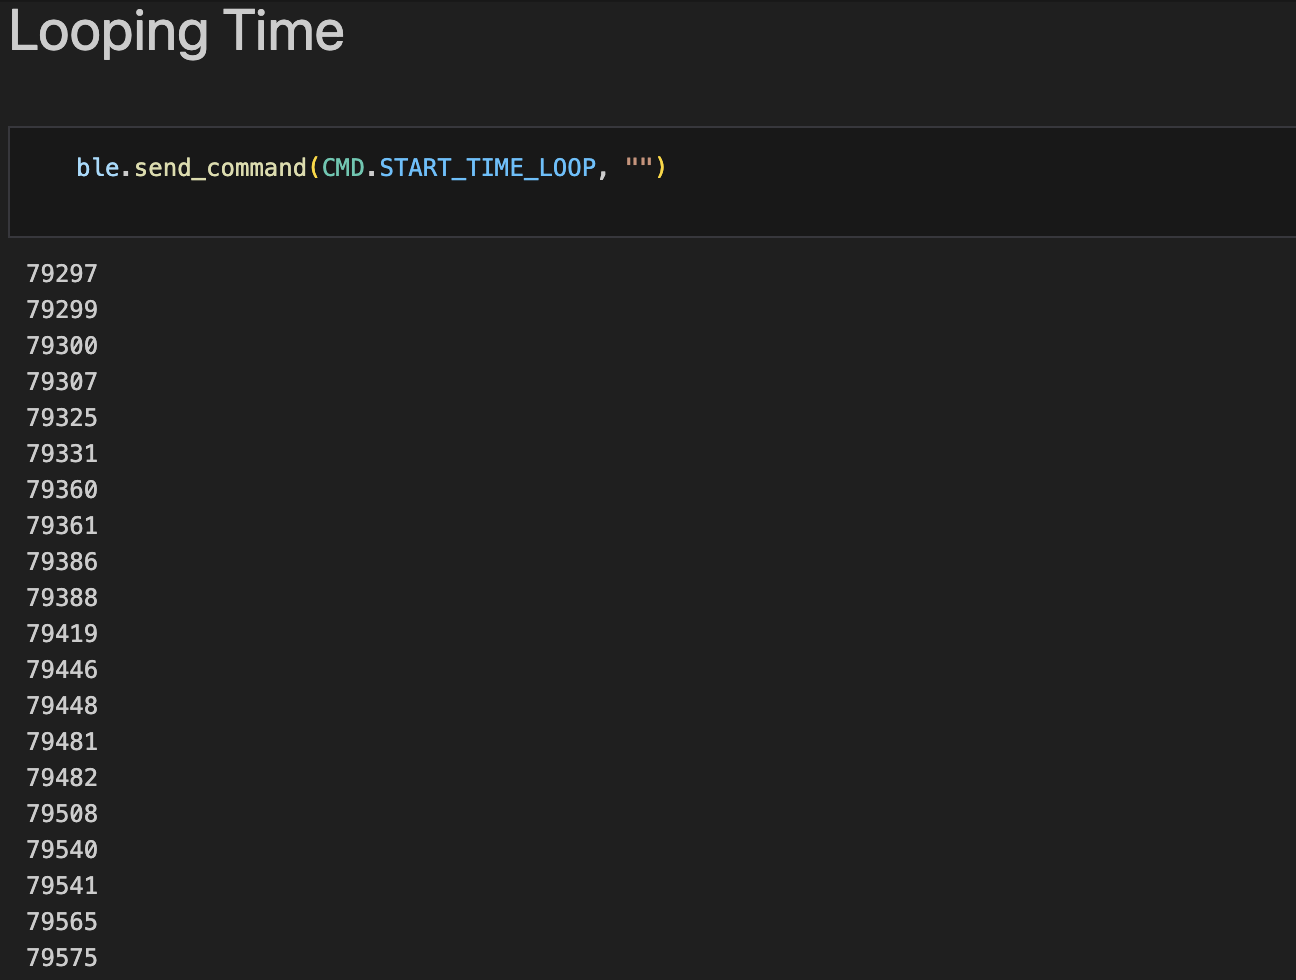
The time between sending these millis() commands varies, with it sometimes only being one milliseconds in between, but sometimes taking upwards of 30 milliseconds. The average time between these is about 14 milliseconds. Since each string is 8 characters (T:123456), The effective data transfer rate is 8 bytes/14 ms, or 0.57 bytes/millisecond.
Task 6 - Time Array
Now all of the timestamps are to be stored in an array and then sent out. I accomplished this by altering my loop to put the timestamp value in an array of size 128, breaking once the array is filled. I then added the command SEND_TIME_DATA to loop through this array and send each of the timestamps back. The notification handler stores these timestamps in a list.
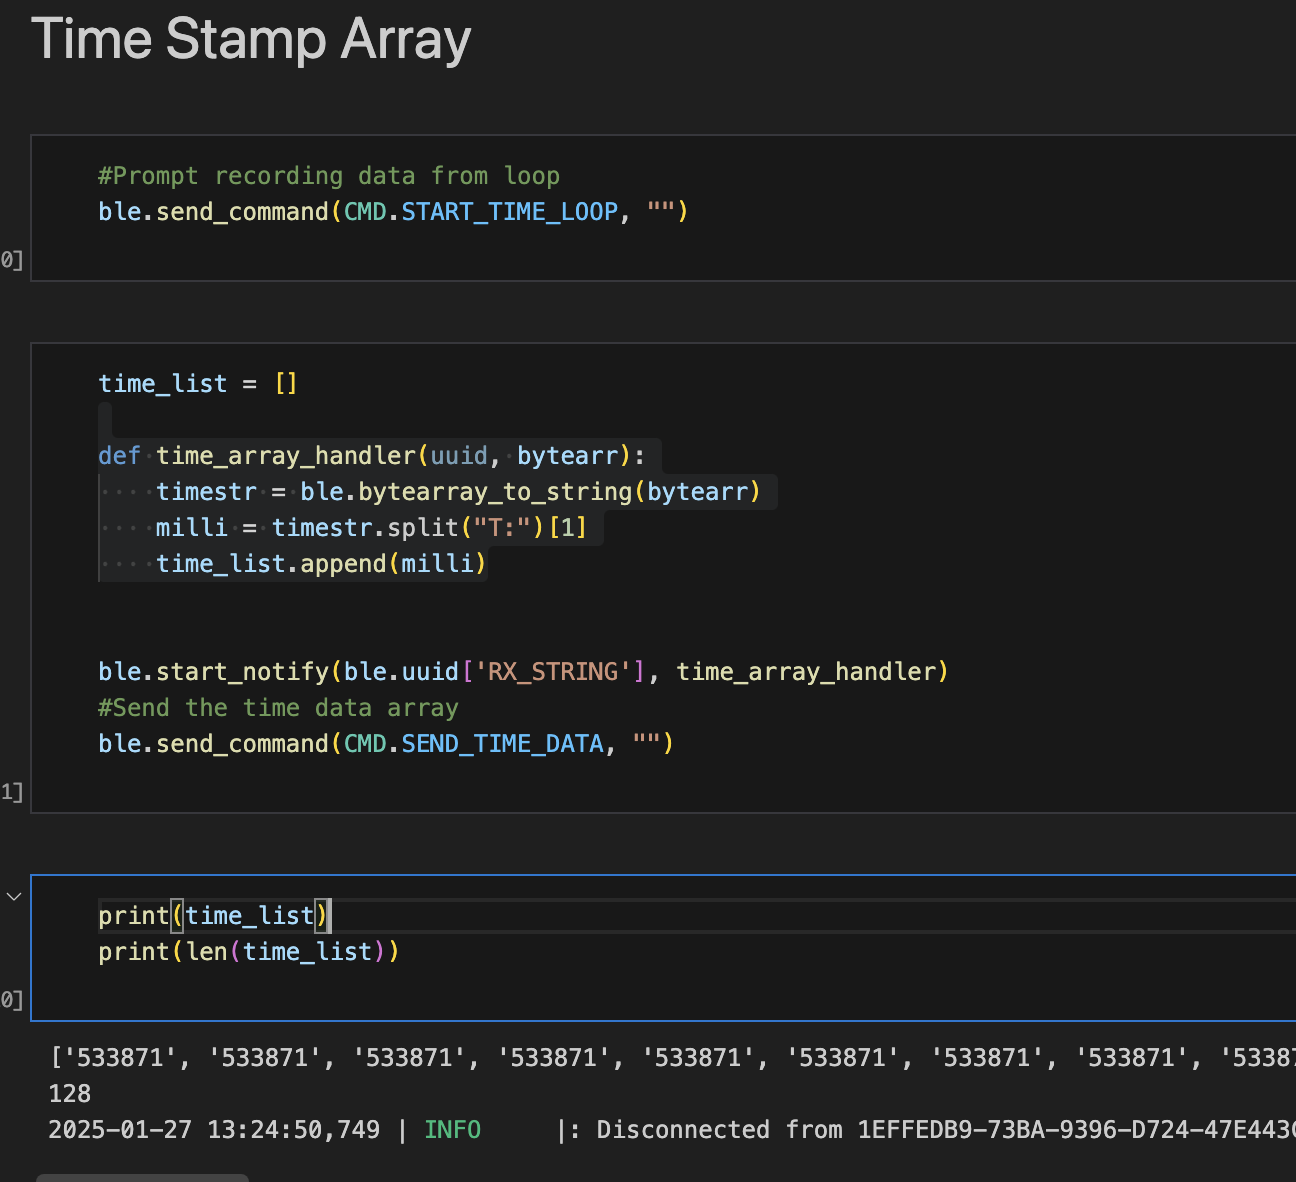
All of the data was sent over, but more interestingly the timestamps only incremented1 ms at a time at most, showing the bluetooth communications were significatly slowing the rate of data collection.
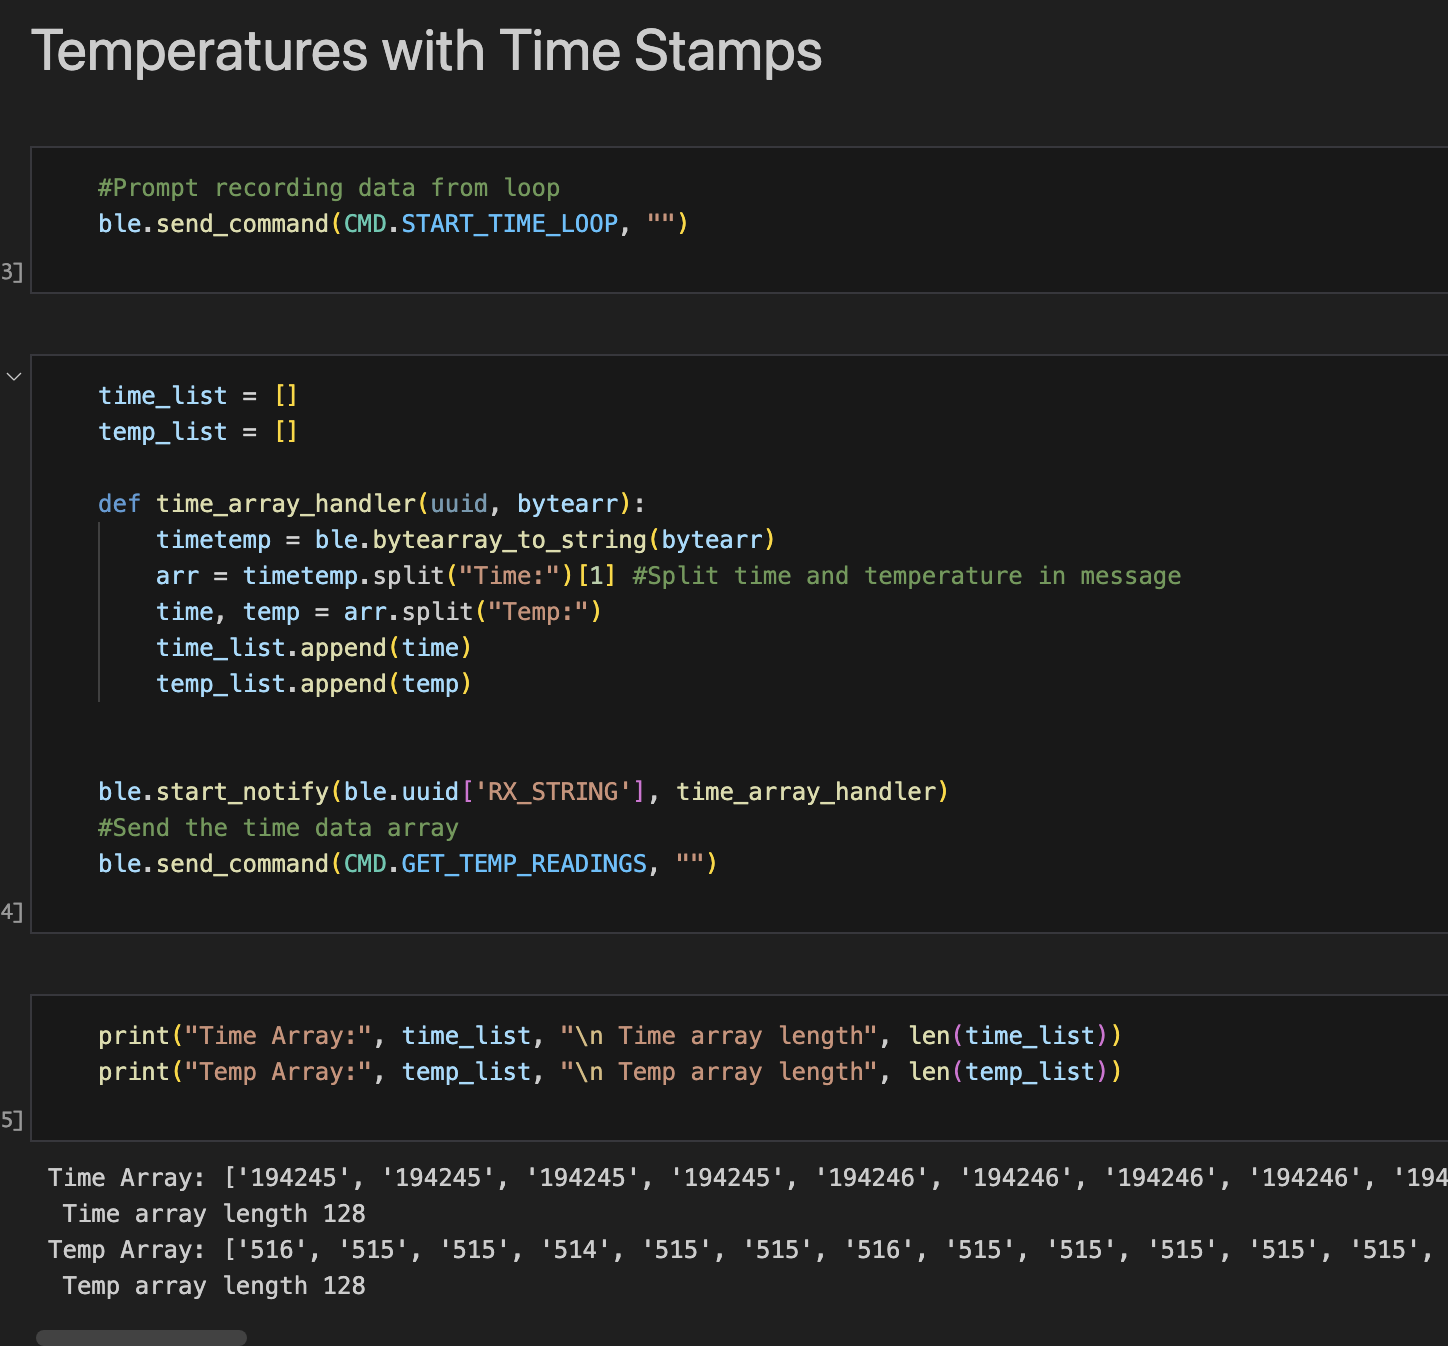
Task 7 - Temperature Array
This task has the temperatures also being recorded with their respective timestamps.
I accomplished this with the analogTempRead() function, making the loop as follows:
                    unsigned long startMillis = millis();
                    //Five seconds, can increase
                    int i = 0;
                    while(millis() - startMillis < 5000) {

                      //Array Implementation (Part 6)
                      time_arr[i] = int(millis());

                      //Temp Implementation (Part 7)

                      temp_arr[i] = analogReadTemp();    // raw ADC counts from die temperature sensor
                      //float temp_f = getTempDegF();  //can swap to float array and use this for farenheit

                      i ++;
                      if (i == LEN){
                        break;
                      }
From there, I added a command GET_TEMP_READINGS, which concatenated the timestamp and temperature before sending, with the notification handler splitting them.
Task 8 - Discussion of data collection
This task compares collecting data in arrays and then sending it versus continually sending the data. Collecting data in an array removes any bluetooth communications during the collection, making it so data can be recorded much faster. Conversly, constantly sending the data means that the data received is closer to live time. Thus, the priorities of the application determines which method is better. If having accurate and contiguous data is a priority, then storing in an array is better. An example of this would be recording performance analystics of a device. However, if the priority is to use that data in live time, such as a live graph, then it is far better to contiguously send it. The array method introduces another constraint, being how much data can be stored. The Artemis has 384 KB of RAM, meaning at most 384 Kilobytes of data could be stored at once. Since the time and temperatures are 2 byte ints, we could store 192,000 time stamps or temperatures before running out of memory. However, other things will likely occupy RAM, reducing this amount.
One potential solution to this tradeoff is to do a combination of the two methods. That is that data is stored in relatively small arrays, and then these arrays are sent all at once. This helps keep closer to livetime while avoiding the latency of bluetooth in between data points.
5000 Task - Effective Data Rate And Overhead
This task requires sending data packets of different sizes and seeing how the transfer time changes. To acheive this, I implemented a command called INIT_VAR, which generates a message of variable size. I accomplished this by creating a char array, done in the following code:
                    int len;

                    // Extract the next value from the command string as an integer
                    success = robot_cmd.get_next_value(len);
                    if (success) {
                      if (byte_str){
                        free(byte_str);
                      }
                      byte_str = (char *)malloc(len);

                      //Init variable string length
                      for (int i = 0; i < len; i++){
                        byte_str[i] = 'a';
                      }
                    }
                    break;
This is seperate from the bluetooth transmission to avoid adding overhead. To time each transmission,
I used time.time() in python to record a starting time. The VAR_BYTE_RESPONSE command I made is used to
prompt the arduino to return the string. A notification handler recieves this response and take a second
timestamp, recording the total transmission time. Below is an example for 5 bytes:
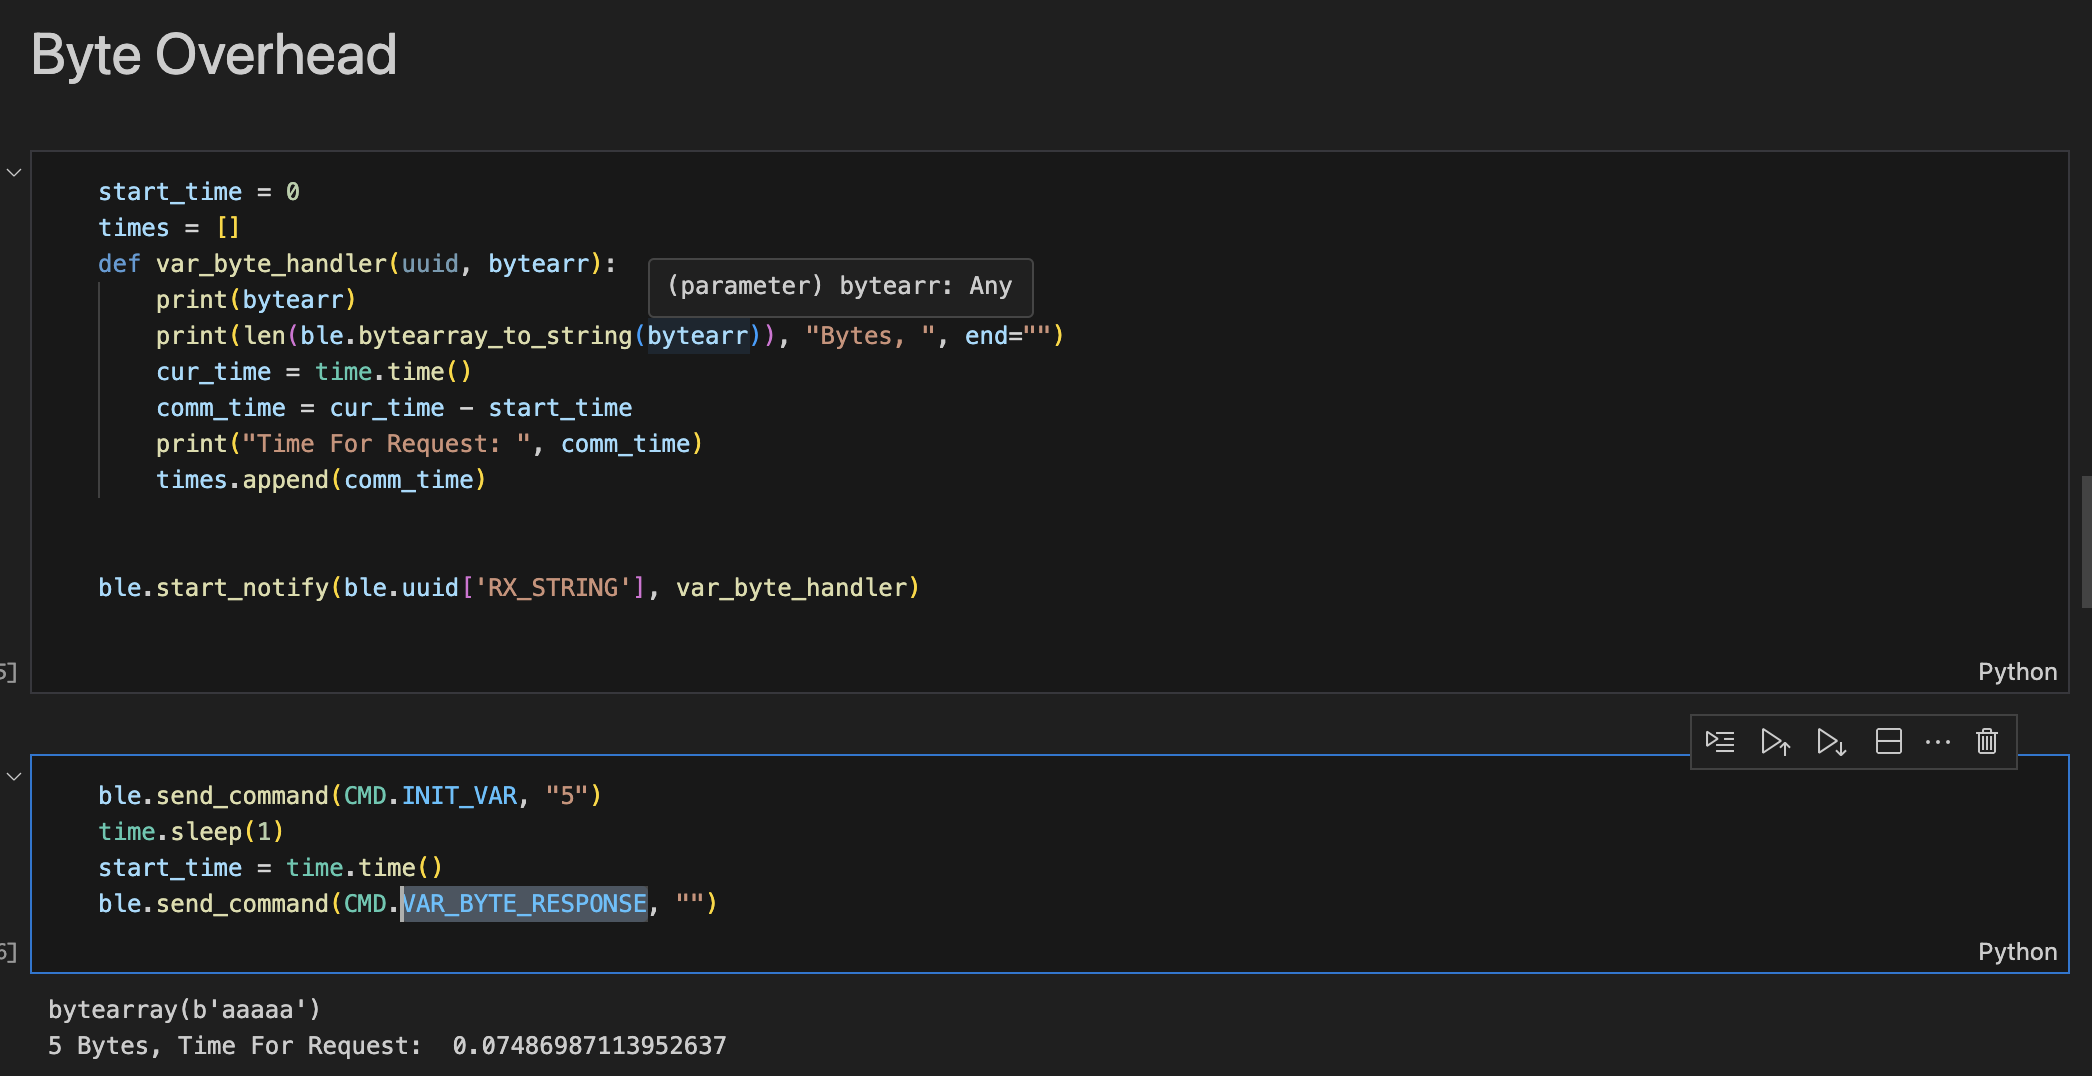
This method isn't perfect, as it records the bluetooth overhead of sending the initial command, but it is sufficient to demonstrate relative data transfer rates.
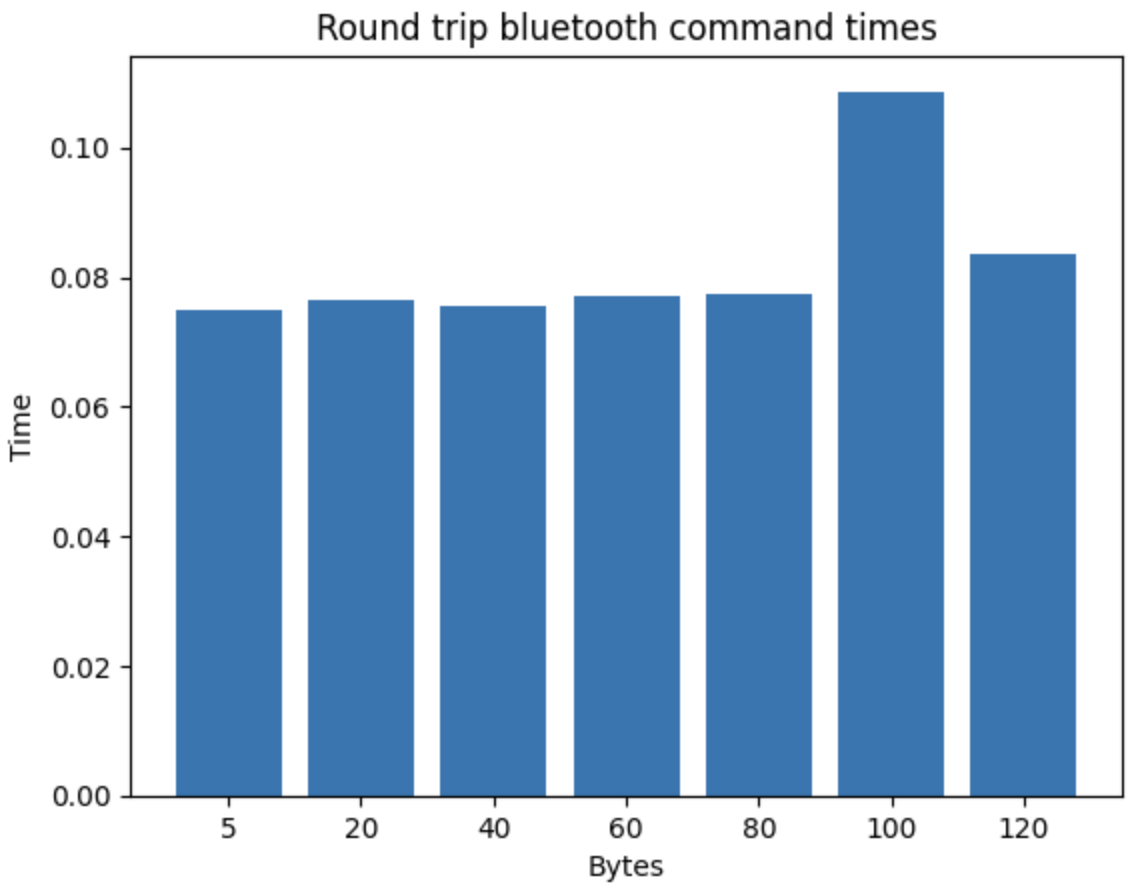
This graph displays the roundtrip times of sending the initial bluetooth request and the variable size response. The 5 byte transfer was the fastest, with each increasing size roughly taking slightly longer. There is some inconsistency, especially with the 100 bytes transfer. I suspect this is from some variability with the bluetooth overhead, as each run gave different results. To me, it seems like each data size has a similar amount of bluetooth overhead, with all of taking similar amounts of time (0.075-0.085 excluding 100 bytes). However, the extra time caused by increasing the bytes sent is far less than the time that the bluetooth overhead, seen in how similar each overall time is. This implies that it is more efficient to send a larger number of bytes at once, reducing how often the bluetooth overhead occurs.
5000 Task - Reliability
To test the reliability of bluetooth transmissions, we had to see if any data would be lost when sending as quickly as possible. My approach was a loop that contiguously sent 1 int, with the int incrementing each time.
                    case INT_LOOP:
                    {
                      int i;
                      while(i<10000){
                         tx_characteristic_float.writeValue(i);
                         i++;
                      }
                      Serial.print("Done");
                      break;
                    }
I called this loop under a new command, INT_LOOP. This approach allows checking if any data was lost by ensuring each recieved message increments by one. A notification handler is on the python side to receive these messages as quick as possible.
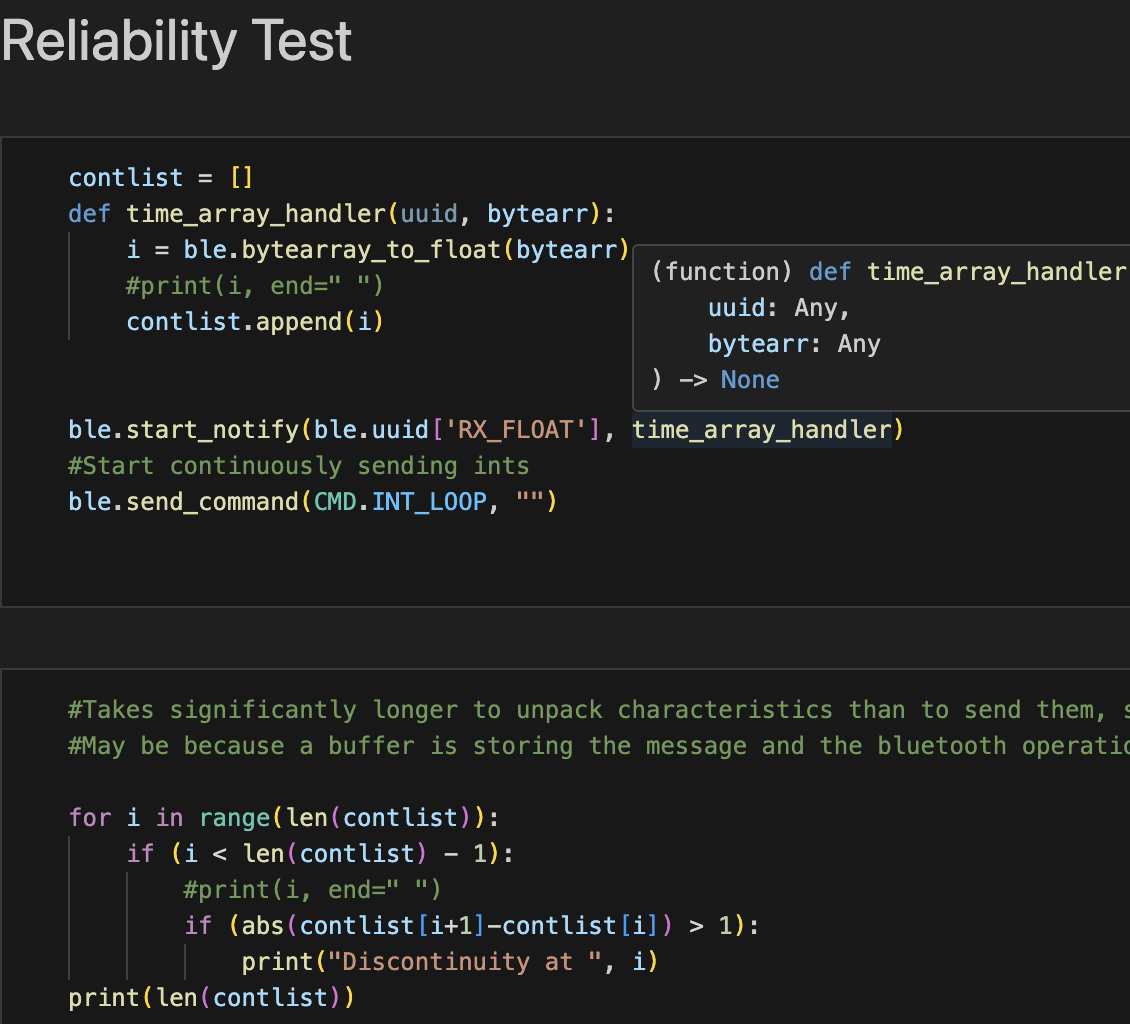
What I discovered was that none of the data ended up being dropped. However, the number the Arduino reported sending was getting progressively further ahead of the one received. I suspect when the Arduino sends something over BLE, it is put in some sort queue, which is then extracted from by the notification handler. This results in none of the data being dropped, but the received data falling behind the sent data. Thehe receive_float function was also tested, but interestingly is only gets the most recently sent characteristic. Thus, it is possible to miss data with receive but not with the notification handler.